MAKING PAPER GARMENTS
- Louise Love
- Sep 20, 2022
- 3 min read
Updated: Sep 23, 2022
In recent textiles lessons we have been looking at creating garments out of only paper resorces!! We had access to a range of different papers such as tissue paper, card, cartridge paper, printer paper, newspaper, etc.- The idea was to explore lots of different paper manipulation techniques to create texture and variation within the garment and paper; hence creating a much more interesting and varied outcome. We were looking in particular at ideas that would link to our white on white theme of origami, fabric manipulation and folds.
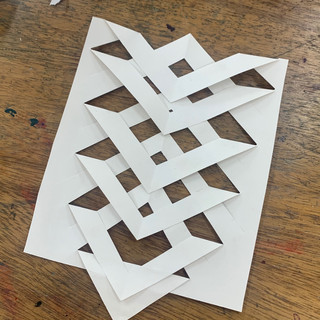
We spent the first half of the lesson exploring and sampling techniques that we could use to manipulate the paper. I looked at things like scrunchring, rolling, pleating (box and knife pleats), ruffling, ruching, cutting, origami folding techniques, etc. to create a wide rage of textures, shapes and forms.

During the second half of the lesson, we were to create the final paper garments!!
Before creating my paper garment, I started to have a little think about and a little sketch of ideas, however, when it came to the making, I was very open to changing and develouping my ideas as I saw fit.
I decided to use some of my favourite techniques from the sampling stages, starting by pleating the lower half of the skirt with knife pleats and then layering up little pleated fans that I had created to add move body and volume to the skirt.
I then worked on the top half of my outfit; I'm srunching up paper to created a textured bodice form that I then worked ontop of, adding in little paper manipulation flowers and pleat fans. On one half of the bodice I created a much more structured, three-dimensional look by rolling long strips of paper and lining them up in a row.
I then develouped one half of the bodice by the addition of paper flowers and pleat fans across the shoulder like an asymmetrical strap. I then twisted together pieces of tissue paper to create a strap across the other side of the dress, joining to the back.
Next was to start work on the back of the paper garment. I started by actually creating this long centre back piece by cutting and foling paper slits to create thing long 'spine-like' texture that I tried in the sampling stages. This provided a good basis and starting point for the back of the garment. I then had the challenge of working around this by the addition of more paper fans and pleats; scrunched elements of paper continuing from the bodice front, etc.
To build-up the back of the skirt I worked with more pleat techniques; - this time focusing on box pleats for added dimension and layers. I also worked-in more knife pleats that I layed flat to achieve a slightly different look.
To finish I decided to add some ruffles at the waist of the garment as I felt the skirt and bodice seemed quite differenciated and seperate and so I was looking for a way to tie it all together as one dress. The ruffles worked well to do this as well as creating a playful bit of layers and volume at the waist piece.

Overall, I was really pleased with how my paper gament look turned out and I felt like I was really able to become more free and experimental in the ways in which I was working which, in turn, served to create something really unique and varied!


Comments